
Catalog Import
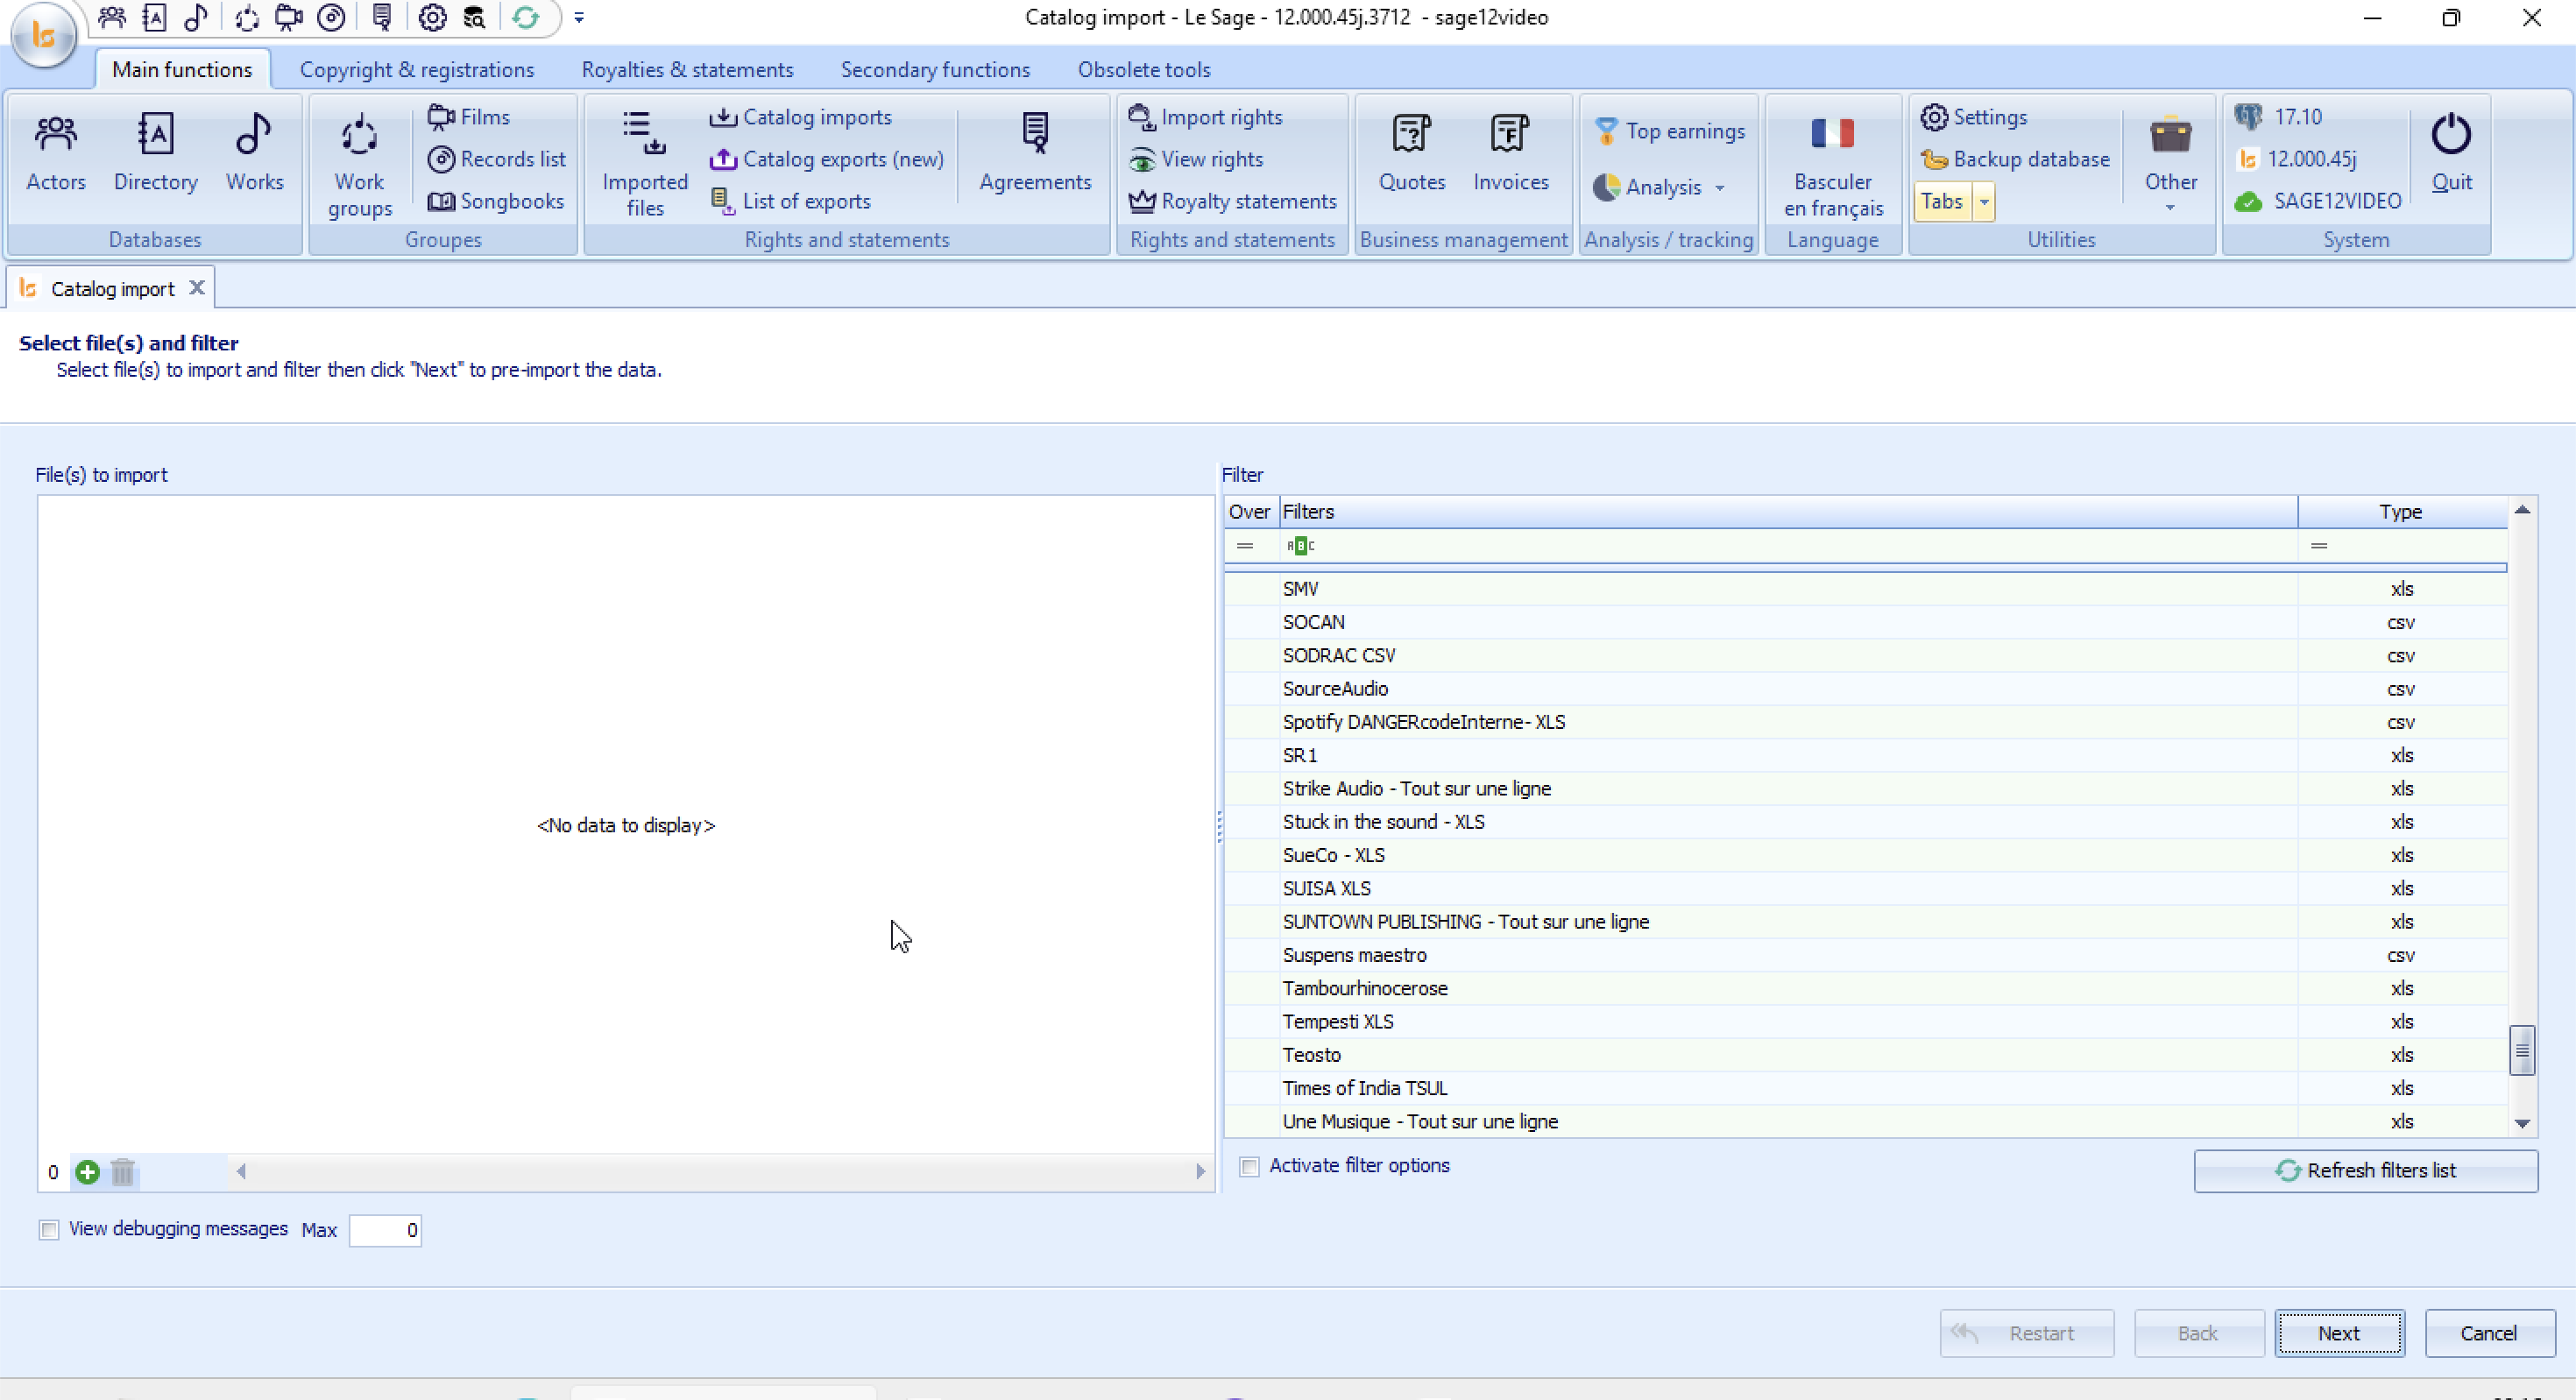
This page allows you to upload external data files (catalogs, tracks lists, etc.) whatever the source and format (except PDFs) and apply a specific conversion filter tailor made to every version.
The screen is divided into two main sections:
-
Left Side (File(s) to import): The area where you select and manage the files you want to upload.
-
Right Side (Filter): The list of available import filters designed to properly parse the format of your files.
1. Step-by-Step Import Procedure
Step 1: Select the File(s) to Import
-
Add the File(s) to import in the zone on the left (currently showing
<No data to display>). -
Click the + icon at the bottom left of this area to browse your computer and add one or multiple files that have the same format.
-
Note: If you select the wrong file, highlight it and click the Trash bin icon right next to the plus button to remove it from the list.
Step 2: Choose the Correct Conversion Filter
The software needs to know how to read your file. You must match it with the correct profile in the Filter section (on the right).
-
Use the search/filter row or scroll through the list to find the filter that matches your provider or data structure (e.g., SOCAN, Spotify, SUISA XLS, etc.).
-
Check the Type column (xls, csv) to ensure your original file format matches the format expected by the filter.
-
Click on the filter to select it (it will be highlighted).
💡 Tip: If you have recently added or modified a filter and it does not appear in the list, click the "Refresh filters list" button at the bottom right of the filter section.
If you do not find the filter to import your file, send it to us with the name of the provider and we will - send you a new filter or an updated version that you will copy/paste/replace in c:/LeSage12/FIlters.
Step 3: Validate and Proceed to Pre-Import
-
Once your file is loaded and the correct filter is selected, click the "Next" button in the bottom right corner of the screen.
-
The software will then process the file and move to the pre-importation phase to analyze the data before final integration.
Action Buttons & Navigation
| Button | Action |
| Restart | Resets the entire page to start the operation over from scratch. |
| Back | Returns to the previous step (disabled by default on this initial screen). |
| Next | Validates current selections and proceeds to the next step of the import process. |
| Cancel | Aborts the current operation and closes the import window. |
💡 View debugging messages - only for us : Located at the bottom left. Checking this box displays technical debug messages. This is primarily used if you encounter an error during file analysis and technical support requests the application logs. You can limit the number of displayed messages using the "Max" field.
2. Import Preview
Once you click "Next" on the initial catalog import screen, the software processes your file and opens the Import preview tab. This page allows you to review the parsed data and ensure everything is correct before finalizing the integration into the database.
1. Interface Overview
The preview screen is divided into several analytical panes:
-
Main Data Grid (Top Center): Displays the primary records found in your file (e.g., work titles, codes, and durations).
-
Sound Recordings (Top Right): Shows any audio recordings information linked to the selected work.
-
Actors / Messages (Bottom Left): Displays copyright (composers, publishers, etc.) or validation errors/work numbers/status of the works after CWR registration submission.
-
Linked Data Panes (Bottom Right): Displays additional technical identifiers, collection metadata, or mechanical right breakdowns.
2. Reviewing and Filtering Data
Managing the Main Data Grid
The status text at the top confirms: "Pre-import is complete, click 'Next'". Before you do, verify the parsed items:
-
The 'Imp' (Import) Checkbox: By default, all successfully parsed rows are checked. If you notice a row you do not want to import, simply uncheck its box in the Imp column.
-
Data Inspection: Click on any row in the main grid (e.g., My favorite Title). Selecting a row will dynamically update all the other sub-panes on the screen with details specific to that entry.
Reading the Sub-Panes
-
Actors Tab: Displays the names, roles, and affiliation societies (e.g., ASCAP, BMI, SACEM) found for the selected work.
-
Messages Tab: If you are importing an ACK you can see the messages left by the CMO.
-
Sound Recordings: If your file includes ISRC codes or master recording data, they will populate here for the highlighted work.